C H I C A G O W E D D I N G & P A R T Y R E S O U R C E
W W W . C H I C A G O W E D D I N G R E S O U R C E . C O M97
W E D D I N G P L A N N E R
Ring Sizing
Method A: Measure Your Finger
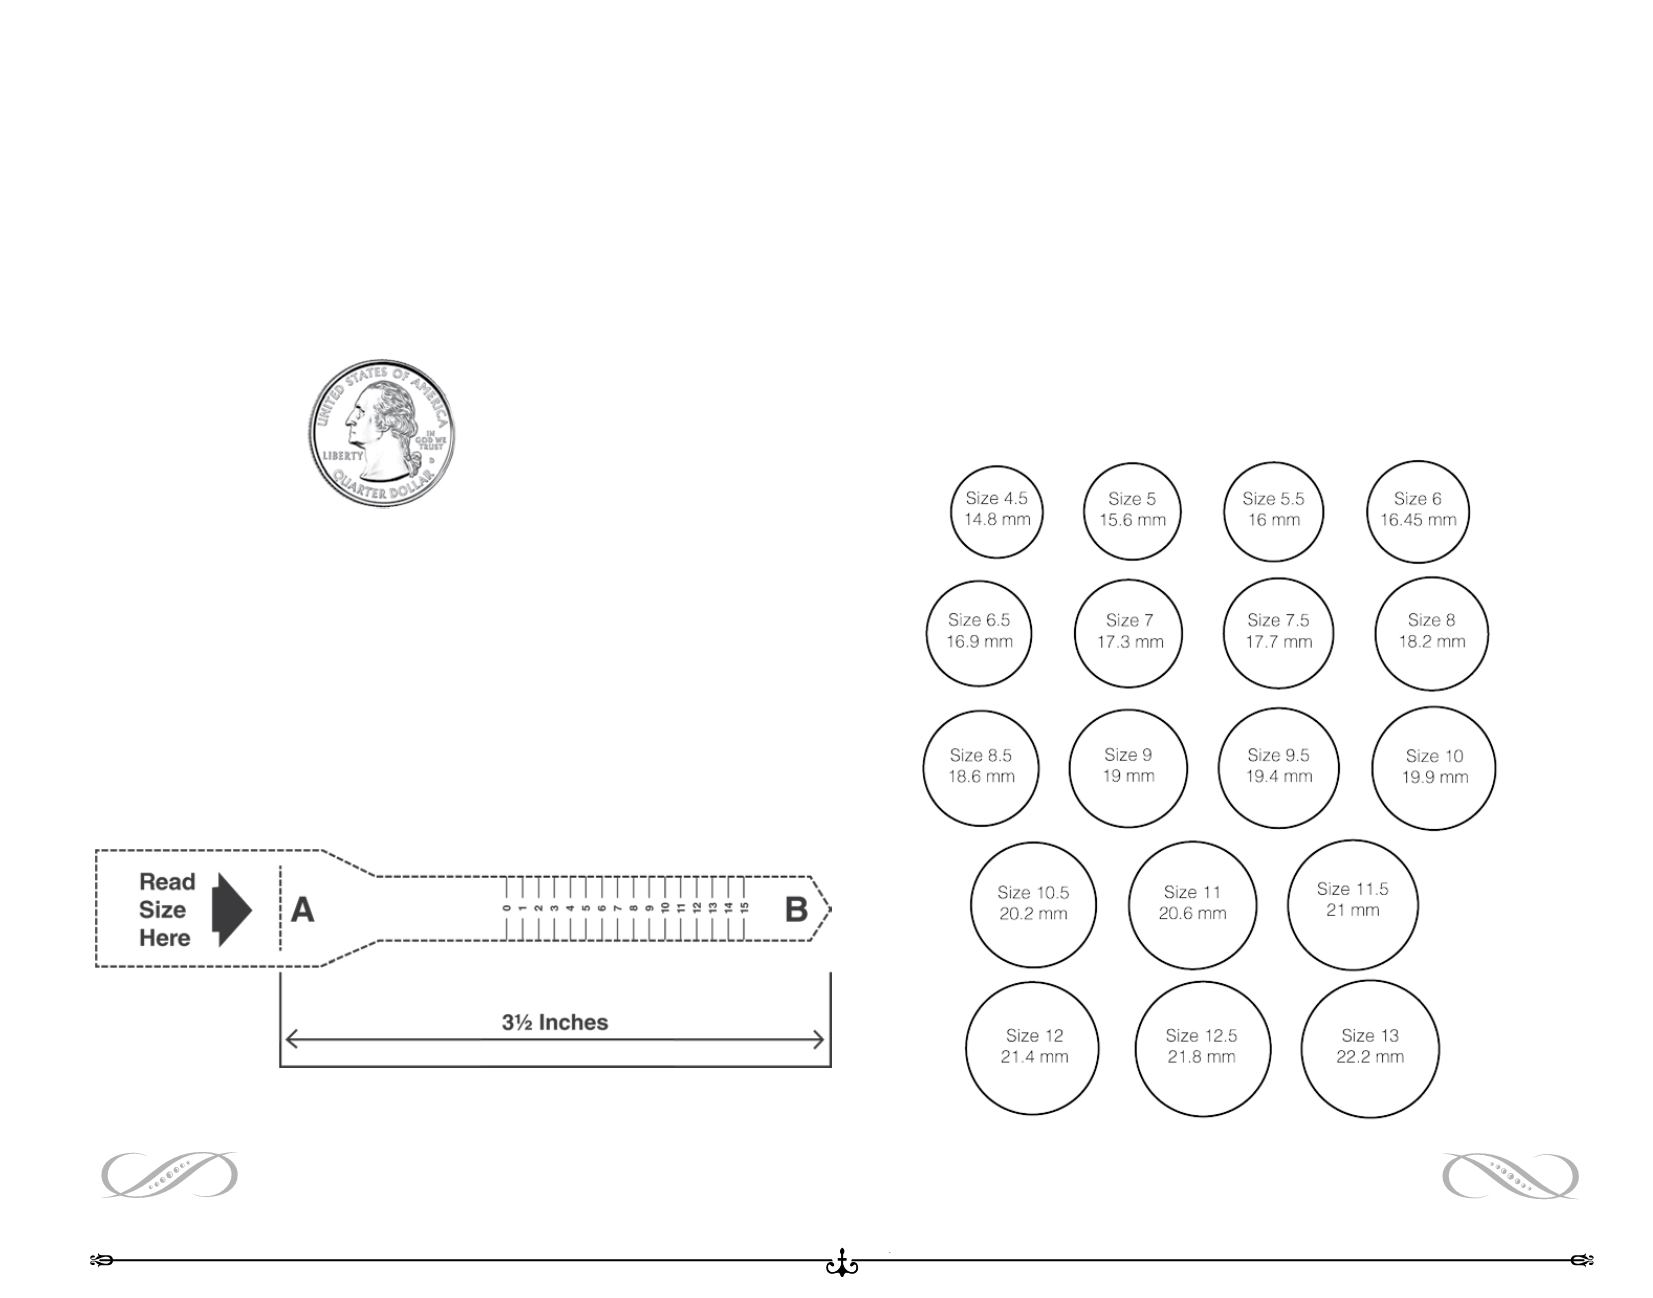
1. Make a copy of this page.
2. Use a quarter to make sure this page is the correct size.
1. Cut out the ring sizer.
2. Cut a slit for Slot "A".
3. Wrap the sizer around the finger where the ring will be worn. Make sure the num-
bers are facing out.
4. Pull the pointed end Tab "B" through Slot "A"until the sizer is snug. Make sure to
allow size for your knuckle. If your knuckle is size in between the two.
5. The number aligned with Slot "A" is your ring size.
6. If the measurement lands between two numbers, your size is a half size.
Example:
If your measurement falls between 5 and 6, your ring size is 5 1/2.
Method B: Measure a Ring that Fits
1. Select a ring that properly fits the intended finger.
2. Place the ring on top of the circle below until the inside edge of the ring
matches the outside of the circle.
If the ring is a comfort fit design, match circles to the contoured edge of the inner
surface of the ring.
Sizing Tip: Measure your finger at the beginning of the day to avoid incorrect measurements.
More sizing mistakes are made by ordering rings too large rather than too small.


